Moving ComfyUI output folder
 jenxi.com
I'm a cyber alchemist synthesizing AI workflows, ancient philosophy, and cross-cultural observations into clearer thinking. Bridging startups to China's ecosystem advantage. Registered pharmacist × Brand strategist × Storyteller
If you’re drowning in a sea of AI-generated masterpieces—and the occasional bizarre abomination—you’ve likely noticed your hard drive gasping for breath. It’s a familiar story: what begins as casual experimentation with Stable Diffusion quickly escalates to digital hoarding of thousands of variations, iterations, and happy accidents. Before you know it, your system drive suddenly starts moving in bullet time and you wonder if you’re Neo.
Fear not, fellow image generation enthusiast. There’s a solution that doesn’t involve the endless shovelling of your output images to the empty secondary drive. Let’s explore how to redirect ComfyUI’s output folder to a more accommodating location.
Why your system drive needs relief
If you’re like me—constantly experimenting and generating hundreds of images per day—your poor hard drives might be starting to wheeze under the strain. This becomes even more critical if you are running your GUI of choice off the C: drive. Filling up the system drive with all these files impacts performance.
For my Stable Diffusion work, I’ve used various GUIs, with ComfyUI becoming my tool of choice for its powerful node-based workflow. The Desktop Application ComfyUI must be installed in the system drive, and the output folder sits there as well, even though it is smart enough to migrate any existing SD WebUI (A1111) or ComfyUI folders by pointing to them.
Option 1: Command line arguments
The most straightforward way to change ComfyUI’s output location—and the one documented in the official guides—is using command line arguments.
For manual installation
If you’re using the manual installation, this is as simple as adding the output-directory argument when you launch ComfyUI:
python main.py --output-directory path\to\new-outputFor Desktop Application
Things become slightly more complex with the Desktop Application since you launch by double-clicking on the application shortcut. The shortcut is running the launch command for you, so you’ll need to modify the .bat file to add command line arguments to the launch command:
- Locate the launch script at
C:\%APPDATA%\Local\Programs\@comfyorgcomfyui-electron\resources\ComfyUI\.ci\run_nvidia_gpu.bat - Change:
To:.\python_embeded\python.exe -s ComfyUI\main.py --windows-standalone-build pause.\python_embeded\python.exe -s ComfyUI\main.py --windows-standalone-build --output-directory X:\path\to\new-output pause
Limitations of this approach
The problem with modifying files is that you will have to make the modification again if the batch file is overridden in an update. For those who rarely update, this is a perfectly viable solution. For everyone else, there’s a more resilient approach…
Option 2: Symlink solution (recommended)
Rather than wrestling with command line arguments or editing batch files that might be overwritten, I’ve found that using symlinks offers the perfect balance of simplicity and reliability.
What is a symlink?
If you’re not familiar with symlink, it means symbolic link, a way to point the system to another location. Think of a symlink as a sophisticated digital signpost—it appears to be a folder, but it’s actually directing traffic elsewhere.
This means that you can have your output folder in another drive and place the symlink in ComfyUI’s default folder. Your ComfyUI still thinks it’s saving files to its preferred location, but the actual files are actually directed to a secondary drive. This allows you to free your system drive from the clutter of thousands of output images.
I also use symlinks to point other drives to my Stable Diffusion models folder. This makes the GUI applications think that all my models are in one folder, when they are in fact spread all over three different SSDs.
Benefits of using symlinks
Unlike modifying batch files or launch parameters (which can break during updates), this approach:
- Survives ComfyUI updates without needing reconfiguration
- Works with any ComfyUI installation method (manual, Desktop App, or portable)
- Requires no technical knowledge beyond using Command Prompt once
- Eliminates the risk of you breaking ComfyUI by editing the wrong file or make an error in the modification
- Can be easily changed later if needed
The symlink essentially creates a digital illusion—ComfyUI believes it’s writing to its default location, but the operating system quietly redirects that data to your chosen destination. It’s like having your mail forwarded without having to tell everyone your new address.
Setting up your symlink
-
First, locate your current ComfyUI output folder (typically something like
C:\ComfyUI\outputor if you’re using the Desktop Application, checkC:\Users\YourUsername\AppData\Local\Programs\@comfyorgcomfyui-electron\resources\ComfyUI\output) -
Create a new destination folder where you actually want your images stored (perhaps on that roomy external drive or secondary SSD)
-
Delete or rename your original output folder (backup any images you want to keep!).
-
Open Command Prompt as Administrator (⚠️ this is important!)
-
Create the symlink with the magic words:
mklink /D "C:\path\to\original\output" "X:\path\to\new\output" -
That’s it! ComfyUI will continue saving to what it thinks is the same location, but your precious disk space will be preserved.
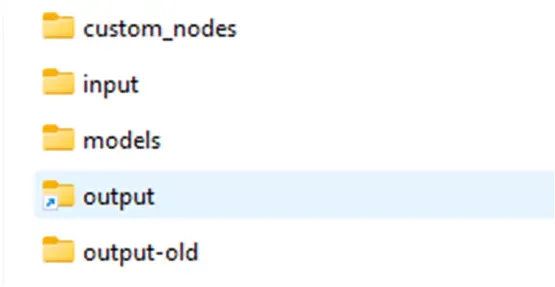
If you’re curious about what’s happening behind the scenes, the /D flag tells Windows to create a directory symbolic link. After running the command, you should see a confirmation message like:
symbolic link created for C:\path\to\original\output <<===>> X:\path\to\new\outputHere’s what the folder would look like in Windows Explorer—note the shortcut-like icon indicating it’s a symlink:
Testing your symlink
You probably don’t need this reminder, but I sure needed it. Before generating hundreds of images, it’s worth running a quick test:
- Launch ComfyUI
- Generate a simple image
- Check both the original path and your new destination
- Confirm the image appears in your new location rather than consuming space on the original drive
Troubleshooting common issues
If you encounter problems with the symlink approach, here are some quick fixes:
- “Access is denied” error: Make sure you’re running Command Prompt as Administrator
- “The system cannot find the path specified”: Double-check both paths for typos
- “Cannot create a file when that file already exists”: Ensure you’ve deleted or renamed the original output folder
- Images still saving to C: drive: Verify the symlink was created successfully by checking its properties
Conclusion
Sometimes the simplest solutions are the most effective. By using symlinks, you’ve essentially given ComfyUI a secret portal to store files wherever works best for your system. Your C: drive—or whichever drive your system is on—can breathe easy, and you can continue creating without interruption or storage anxiety.
This approach has saved me countless gigabytes and the frustration of repeatedly reconfiguring ComfyUI after updates. While there’s a certain satisfaction in tweaking configuration files directly, I’ve come to appreciate solutions that require less maintenance over time.
After all, the less time spent managing where your AI images is saved, the more time you have to actually create it—and isn’t that the whole point?
Keep reading
 Cyberbrain
Creating baby names with AI
Blending ancient wisdom with AI to craft meaningful Chinese names.
 Cyberbrain
Turbocharging self-learning with AI
From library books to AI mentors: learning's digital evolution.
 Cyberbrain
10+ Best Stable Diffusion checkpoints (SD 1.5)
Comprehensive guide with examples and usage recommendations.